Add Your Photos
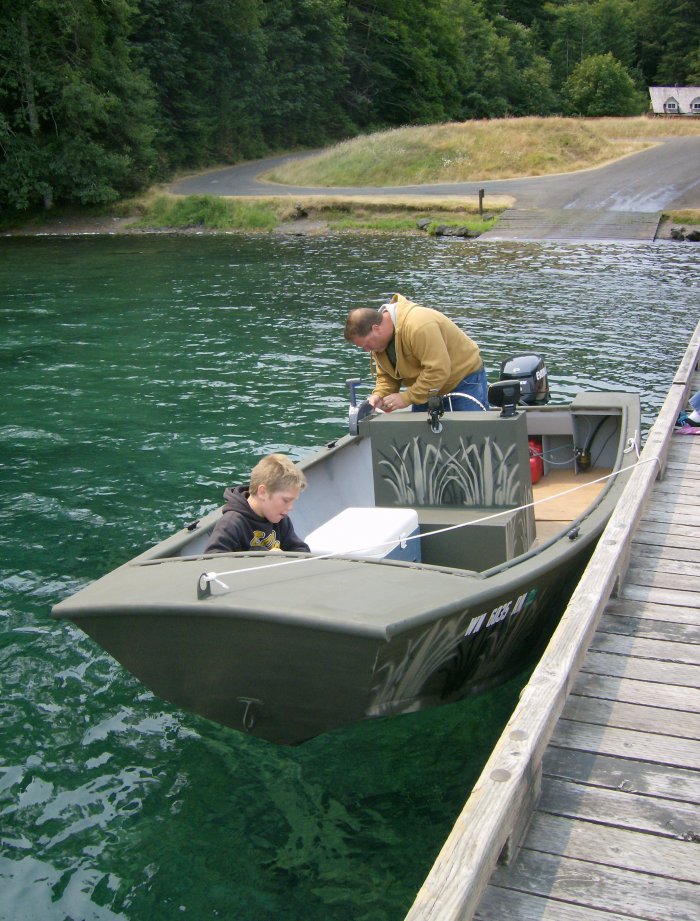
February 2013 These are photos of my Jimbo project which I started in February 2010 and finished by July 2010. We use it to crab and fish. A majority of the welding was done at the local community college in the welding program. I did all the work myself with the exception of some cutting which was done by a friend. All hand tools and a wire feed machine. Strictly talking about the production of the hull the cost was $1980 for material. Standard marine grade and 6061 extrude parts. I did make a few changes to it. I used heavier gauge for the chines, put a water tight storage box in the bow. I shorted the motor well a little to give me more free board. I have most of the tools I used. Did a lot of cutting with a circular saw with carbide blades. Works good. The last photo is of me and my kids. They look like some happy boaters.
24 Photos
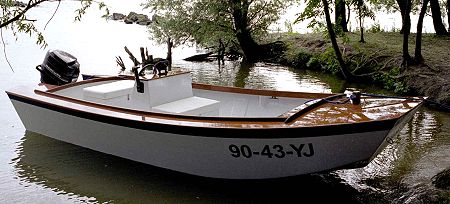
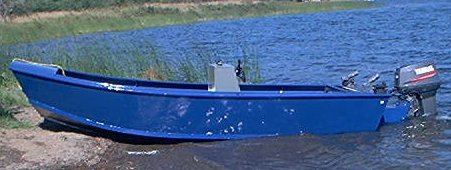
Subject: Jimbo aluminum Date: 3-13-03 I would like to let Glen L know that I have built and completed the Jimbo in aluminium at the end of Aug. 2002. Here are some pictures and also how the boat performs. The plans were straight forward and easy to follow. I used steel angle iron for the jig, wood was too light because the whole boat is made from 3/16 plate. I also changed the stern a bit by eliminating the motor well and adding a c drive to the transom. The over all length is 18\'. I use the Jimbo out on the west coast of Vancouver Is, British Columbia Canada. I been out in 15\' to 20\' rollers with a 2\' to 3\' wind chop on top and the boat carves great and is very dry. Power is 60 hp Yamaha top speed is 35 mph on the GPS. comfortable cruising speed is 20 to 25 mph. I get alot of complements on the boat and it turns alot of heads. Great boat and design. Regards Ken Blackburn
3 Photos
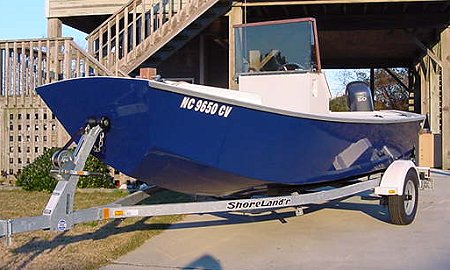
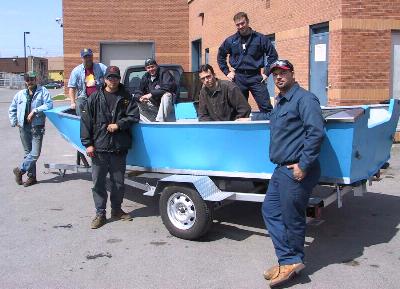
Subject: Boat update Date: Fri, 04 May 2001 06:08:48 -0700 From: Brian Burton HI, It took a little while to get every one back after their work study in order to have a class picture with the boat but a last it has happened. It was a lot of fun doing this project! Thanks Brian Burton The following is from the Project Registry JIMBO-ALUM / Brian Burton / bburton@csnewfrontiers.qc.ca / 3-12-01: Started construction on the Jimbo Aluminum on March 12, 2001 with my class of 8 students enrolled in a Welding Assembly course, purchased 5\' x 16\' aluminum sheets in order to eliminate as many seams as possible to ensure structural integrity. Day 1 we cut out the bottom in one piece instead of two seperate halves, removing the wedge piece at the bow from \"0\" to \"4\". We are planning to score the outside part of the bottom half the tickness in order to form the bottom \"V\" with ease and then weld the groove to fill it up flush. Sides, Transom, and Bow were also cut, all the cuts were made with a skill saw fitted with a fine toothed blade and then deburred with files. Day 2 - March 13. Placed the bottom in the jig and formed it to fit the \"v\" and then tacked the seam in the middle. Started to tack the side at point 5# and worked our way back to the stern and then worked our way forward to the bow. Placed the transom and the bow with small tacks. Day 3 - March 14. Began welding the joints and seams up full starting with the outside on the chime. Things are going well, too well. Day 4 & 5. Spent these two days welding all the seams on the hull, When the chines, transom, bow, and keel were finished welding we turned the boat upside down and welded the underside of the keel.Drilled the hole in the transom for the drain plug, We then fliped it back right side up, moved it close to the door and filled it up with water while the boat sat in side the jig in order to check for any leaks, The next morning (Sat. March 17) three students and myself showed up to see if there was good or bad news, and to our relief everything was dry under the boat. We then pulled the plug, sat around and watched the water drain from the boat and told each other how good things were progressing. Day 6 - March 19. Today we started to install the longi\'s, vertical members, and longi caps to the lower sole at a 8\" water line. Things are going smooth, no major problems yet to talk about. We are 5 working days into the project and things are moving along on schedule, I tabled 3 weeks for this project and with 1 week down and 2 to go we are looking at finishing on time. Day 7 - March 20. With the lower section of the sole supports done we started to work on the raised bow section longi\'s, verticals and longi caps. Everything is really starting to fall into place and there is a great deal of interest from the other 2 groups in the welding shop as well as the rest of the center. Day 8 - March 21. We have decided to use the front compartment under the raised floor in the bow section as our live well, made from 1/16 stainless steel and measuring 12\" x 33\" x 9\" deep. The wood for the sole(floor) came in today, we ordered 2 sheets of exterior, treated grade plywood 5\' x 10\' x 11/16\" thick, this should do the sole and lids for any compartment covers that we decide to put on the boat. We then cut the wood to fit and then for a little insurance against water damage we gave it a coat of paint. Day 9 - March 22. Went with a few students today to pick the carpet for the sole, picked up a piece of exterior carpet measuring 12\' x 15\'9\" that was left over from a role, perfect fit. It is all in the finishing that makes a product look professional so this is no time to cut corners.I have given the students free reign with this project ( within reason) and allowed them to make a few changes with the design, our motor well runs the full width of the transom, and the transom has 2 pieces of the plywood sandwiched between another piece of aluminium all bolted together with 3/8\" stainless steel nuts and bolts. For drainage from the motor well we drilled a 1\" hole through the transom and welded a piece of aluminium pipe in the hole to the outside and inside plate of the transom. Day 10 - March 23. The bow section is now finished and they decided to close it in with an aluminium sheet which has a fiberglass hatch door for a place to store life jackets, etc... Picked up 3 pumps today, one bilage pump for the boat, one bilage pump for the live well (to drain it) and a 3rd to fill up the live well. With the boat nearing completion I have split up the group into 2 teams, 1 team has stayed with the boat and a 2nd team has begun working on the trailer. Day 11 - March 26/01. The team working on the trailer has finished welding the frame and is now working on the axle for it, we will buy the hub assembly from a local scrap yard with 3 tires and rims and fabricate the rest. The team working on the boat is rolling right along with very little help or input from me, they have cut the carpet to fit the 2 pieces of sole( lower and upper) and using a staple gun have fixed it onto the wood. They covered the carpet with a plastic sheet so that it is protected when they sand blast, paint, and just from the general traffic while working on it. We then put the soles back into the boat without screwing them down so that we could start fabricating the console and compartments that will run partial lengths of the sides. The gunnel has also been changed from the plans, we decided to go with a 1\" x 2\" x 1/8\" wall tubing that we put a 5/32\" slit into the under side so that we could slide it over the sides. This has really stiffened up the boat and straightened out the small amount of distortion we got from the welding process. Day 12 & 13 - March 27 & 28/01. These last 2 days were spent cutting and forming the aluminum for the compartments and console, which are made from 1/16\" aluminum which will be riveted to the sides just below the gunnel. The team working on the trailer has all but finished the trailer so I assigned them other jobs while 1 student continues to make the supports for the rollers, runners, and winch. Day 14 - March 29/01. Today we screwed down the floor on the lower sole so that we could start installing the compartments and console. 1 of the students is busy fabricating stainless steel eye hooks for the transom that will be used during transportation and the bow when pulling it up on the trailer, he is also making corner brackets that will go about 10\" in on the transom and out on the sides on a 45 degree angle for extra strength. Day 15 - March 30/01. The trailer is done, except for the wiring for the lights. The boat, ALMOST! You can just keep going and going with this project, it has become a real labor of love with the class, even the students who were not really thrilled about the idea of making a boat have really come around and have been bitten by the boating bug. We have set the boat on the trailer in preparation of sand blasting which will have to be done outside, for obvious reasons. We had to make the final adjustments on the trailer after we sat the boat on it, such as the height of the rollers under the keel and the runners that have been covered with carpet. Day 16 - March 31/01. We are now into overtime on the boat, maybe only giving 3 weeks to complete this project was a little unrealistic but it was more than a exercise in assembly, It was an exercise in working under pressure and time demands, which they will all be faced with in a couple of weeks when they are finished the course and get a job. We started off the day by tapping of the gunnel and chine which we have decided to leave unpainted for contrast, and then pushed the boat outside for sandblasting. What a messy job, I was not even the one doing the job and I have sand in places that I will not mention. We then pushed the boat back into the shop to let it warm up before we start applying the primer because it began to snow a little bit just as we were finishing up. After waiting about an hour and a half we sprayed the boat with a gray primer after cleaning it with acetone. Tomorrow is another day, 12 hours in here on a Sarurday is enough. Day 17 - April 1/01. We agreed to meet at 9:00am but with the clocks going ahead one hour last night I am the only 1 here, HA! HA! April fools to me. The student who is the painter showed up at 10:00am and we put another piece of plastic over the top of the boat so that the inside would remain the primer gray.After a soft sanding job we began to paint the outside of the boat, we are going with a blue, 3 coats and we are done. A nice white strip on the outside and this boat is going to be a beauty. We allowed the paint to dry while we picked up some equipment and cleaned the spray gun and then we pulled off the tape and plastic that was on the gunnel and chine before the thinner that we added to the paint began to react with the glue on the tape. Now you can really see how it is going to look, leaving the gunnel and chine unpainted was an excellent call from the students.This is the last day for the project since the class will be out doing a mandatory 2 week work study. I will be coming in by myself in order to wire and paint the trailer. April 2-12/01. This has been an exceptional class with a lot of commitment and class pride, during the last 2 weeks some students who have been on work study during the day, have been coming in at night after a full days work in order to complete what they have started. They pulled off the plastic that was protecting the carpet from paint, screwed the lids onto the compartments, finished off the wiring (including toggle switches and identification plate on console), added floatation for buoyancy and vacuumed the interior. My next entree will probably be the last and I will try to include a picture of the completed boat.
2 Photos
Connect with us:


